1. Configure Document Types
Document types are used to categorize the documents that you attach to records or the templates that you create. Each document type can be saved in a unique location.
Default set of document types is provided. You can use these document types to categorize an attachment as a file, image, note, or URL. The File and Image default document types are configured to use Azure storage as the location.
To create a new document type, follow these steps.

Go to the Document types page.
Click New.
In the Type field, enter a short name for the new document type, such as SharePoint or HR Docs.
In the Name field, enter a longer name, such as SharePoint files or HR Docs.
Inside the Class field, define a class to specify the behavior for the document type:
Attach file – The user is prompted for a file.
Attach URL – The user can enter a URL in the Notes field, such as http://www.microsoft.com. The Open button on the Attachments page will open the URL on a browser tab.
Simple note – The user can add a simple note in the Notes field.
If you described the Attach file in the Class field, in the Location field, specify the storage mechanism to use.
If you specified SharePoint in the Location field, specify the Microsoft SharePoint address in the SharePoint Address field. To do this, click the Edit button (pencil symbol) and use the Folder selection dialog box.
2. Configure SharePoint Storage
Microsoft Dynamics SharePoint Online is one of the storage locations that are supported natively. Currently, only SharePoint Online is supported. Support for on-premises SharePoint may be added in the future.
To use SharePoint storage, set the Location field for a document type to SharePoint. Then, inside the SharePoint Address field, enter a valid SharePoint address.
To configure SharePoint storage, follow these steps.

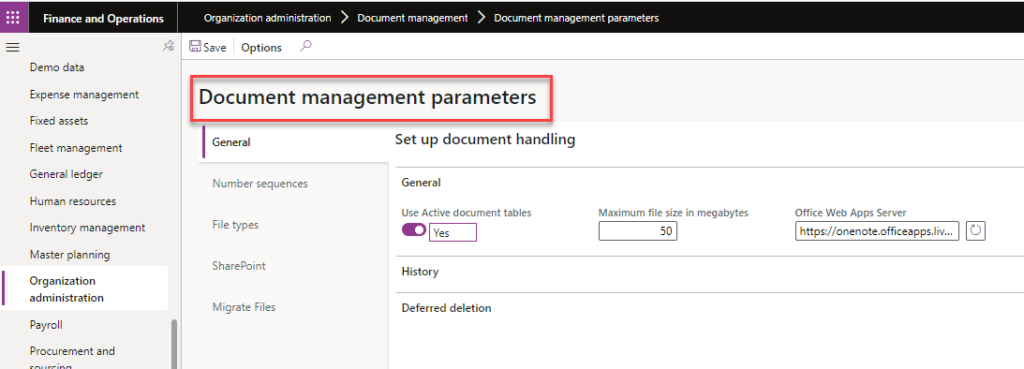
Go to the Document management parameters page.
On the SharePoint tab, in the Default SharePoint server field, review the host name that was automatically detected for the SharePoint site, such as contosoax7.sharepoint.com. Typically, the SharePoint host name is in the form tenantname.sharepoint.com, and accounts on that tenant are in the form user1@tenantname.onmicrosoft.com.
Optional: Click Test SharePoint connection to test the specified SharePoint host name.
Optional: Click Open SharePoint to open the specified SharePoint host name in a browser.
3. Configure File Types
By modifying the list of file extensions that are allowed, you can control the types of files that users can attach to records. To specify file types, follow these steps.
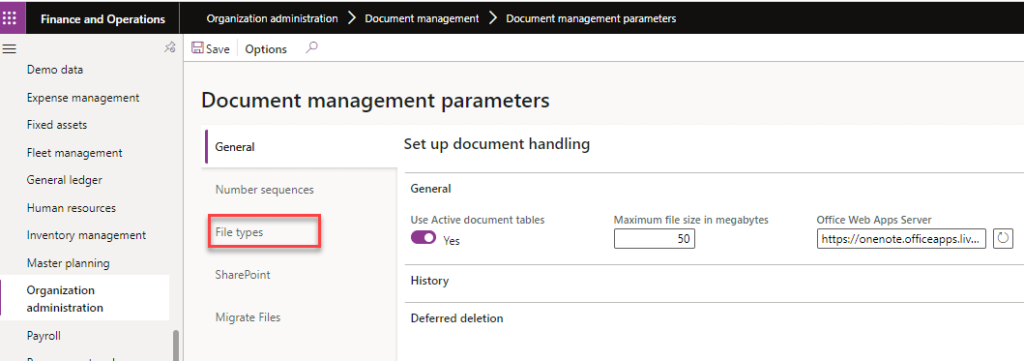
Go to the Document management parameters page.
On the File types tab, review the default file types.
Remove any file types that users should not be able to attach to records, and add any file types that users should be able to attach to records.

4. Configure Document Preview
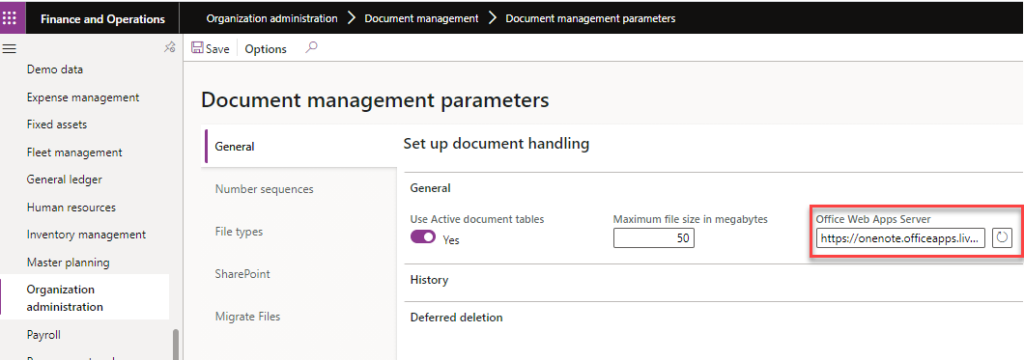
The attachments preview utilizes the Web app Open Platform Interface (WOPI) that is provided by Microsoft Office Online Server. On the Document management parameters page, on the General tab, inside the Office Web Apps Server field, define the Office Online Server instance to use for attachment previews. The default value is https://onenote.officeapps.live.com. This value points to the cloud-based WOPI server.

5. Accessing Document Management Attachments
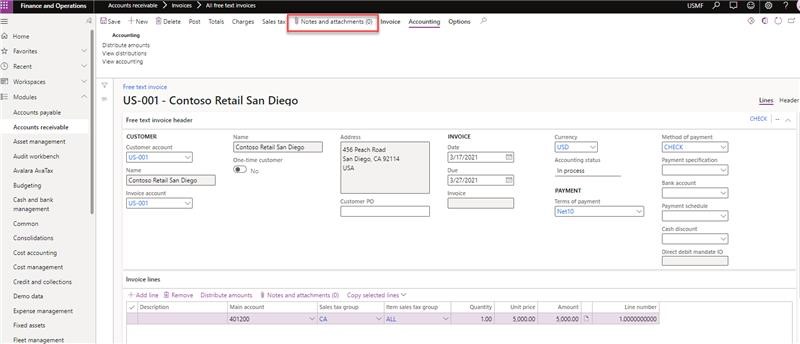
Document management appears to users as the Attach button (keyboard shortcut: Ctrl+Shift+A) at the top of most forms that contain data sources. Clicking the Attach button will open the Attachments form in the context of the data source of the currently selected control on the form.
The Attach button will also show a count of attachments for the currently selected record, so the user can see whether there are attachments on the current record without opening that form.

The count will show 0-9, and then 9+ to limit the performance impact and visual noise of determining and displaying larger counts. For more information on D365 F&O Document Management Configuration, please contact us.


